# 创建 Node.js 命令行工具
最近又接到一个需求:汉化一个英文 Angular 项目。Angular 不是使用 JSX/TSX 来构建 UI 的,而是使用 HTML 模版来构建的,所以不能使用我上一篇文章提到的 jscodeshift 工具。这次我使用了 posthtml (opens new window)(cheerio (opens new window) 也是一个不错的选项),并且我打算创建一个 Node.js 命令行工具 chinesize,它将使用 posthtml (opens new window) 来汉化 Angular 项目。
# 汉化 Angular 项目
汉化 Angular 项目和上一篇 汉化 React 项目 的整体思路是一样的,提取代码里的英文文本 -> 翻译英文文本 -> 替换代码里的英文文本,只是操作对象不一样,汉化 React 项目需要解析 JSX/TSX 文件,而汉化 Angular 项目需要解析 HTML 文件以及 Angular 模版(其本质还是 HTML),所以汉化 React 项目使用 jscodeshift 工具,而汉化 Angular 项目使用 posthtml 工具。
汉化 Angular 项目分两种情况:
HTML 文件,直接使用
posthtml工具进行汉化Angular 模版,需要提取模版字符串,然后汉化模版字符串,最后将汉化后的模版字符串替换原来的模版字符串,比如
@Component({
  selector: 'metrics-pinned-view-component',
  template: `
    <div class="group-toolbar">
      <div
        class="right-items"
        *ngIf="cardIdsWithMetadata.length > 0 && globalPinsEnabled"
      >
        <button
          mat-stroked-button
          aria-label="Clear all pinned cards"
          (click)="onClearAllPinsClicked.emit()"
        >
          Clear all pins
        </button>
      </div>
    </div>
    <ng-template #emptyPinnedView>
      <div class="empty-message">Pin cards for a quick view and comparison</div>
    </ng-template>
  `
})
2
3
4
5
6
7
8
9
10
11
12
13
14
15
16
17
18
19
20
21
22
# posthtml
posthtml (opens new window) 是一个转换 HTML/XML 的工具,主要由两部分组成:
posthtml-parser(opens new window): 一个 HTML 解析器,解析 HTML/XML 到 HTML 节点树posthtml-render(opens new window): 一个 HTML 渲染器,渲染 HTML 节点树到 HTML/XML
所有的 HTML 转换都是通过 posthtml 插件来完成的。这些插件只是简单的 JS 函数,它们接收 HTML节点树,对其进行转换,并返回修改后的树。我们可以使用 posthtml 提供的插件 (opens new window),也可以自己定义插件。
// myPlugin.js
export default function myPlugin() {
  return (tree) => {
    // tree 是 HTML Node Tree
    // 通过 tree 去遍历所有的树节点
    tree.match({ tag: 'img' }, (node) => {
      // 遍历所有的 <img> 元素
      // 可以修改 <img> 元素
    })
  }
}
2
3
4
5
6
7
8
9
10
11
HTML Node Tree (opens new window) 提供了两个 API 来遍历树节点
walk(cb):遍历树中的所有节点match(expression, cb):匹配表达式,搜索对应的树节点
然后就可以使用自定义的插件转换 HTML/XML 了
import myPlugin from "./myPlugin.js"
import posthtml from "posthtml";

const html = `
  <html>
    <body>
      <p class="wow">OMG</p>
    </body>
  </html>
`;

posthtml([myPlugin()])
  .process(html /*, options */)
  .then(result => console.log(result.html));
2
3
4
5
6
7
8
9
10
11
12
13
14
process 默认使用 posthtml-parser 解析 HTML/XML,生成 HTML 节点树,然后通过插件遍历或修改 HTML 树节点,最后通过 posthtml-render 转换回 HTML/XML。
process 函数支持这些选项参数 (opens new window),如果你使用默认的 posthtml-parser 解析器,它也支持 posthtml-parser (opens new window) 的选项 (opens new window)。
# 创建 chinesize 项目
言归正传,接下来我们将创建 node.js 命令行工具:chinesize,它将使用 posthtml 来汉化我们的 Angular 项目。
首先我们创建 chinesize 项目
也可以使用 yarn 或者 pnpm
$ npm init
它会引导你一步一步创建 node.js 项目,你也可以添加 --yes 参数,直接使用默认值创建,更多详情请参考 npm init (opens new window)。
最后会在当前目录下创建一个 package.json 文件
{
  "name": "chinesize",
  "version": "1.0.0",
  "description": "Convert English React/Angular project to Chinese",
  "main": "index.js",
  "scripts": {
    "test": "echo \"Error: no test specified\" && exit 1"
  },
  "keywords": [],
  "author": "cp3hnu",
  "license": "ISC"
}
2
3
4
5
6
7
8
9
10
11
12
Node.js 支持两种模块规范: CommonJS(CJS)和 ECMAScript(ESM),默认是 CommonJS,可以通过在 package.json 文件里通过 type 改为 ESM。
{
  type: module
}
2
3
CJS 和 ESM 的区别,可以参考 What the heck are CJS, AMD, UMD, and ESM in Javascript? (opens new window)
# 添加命令
接下来我们添加 chinesize 命令
首先在项目里创建 bin 文件夹,然后创建 chinesize.js 文件(文件名无所谓,这里只是为了统一)。为了让 chinesize.js 能在命令行工具里运行,我们需要在文件开头添加 shebang (opens new window)
#!/usr/bin/env node
同时还需要添加执行权限
$ chmod 755 bin/chinesize.js
最后在 package.json 里添加 bin 属性
{
  "bin": "bin/chinesize.js"
}
2
3
如果支持多个命令需要使用对象
{
  "bin": {
    "chinesize": "bin/chinesize.js"
  }
}
2
3
4
5
完成上面的操作之后,如果全局安装我们的包,在 Mac 电脑上 bin/chinesize.js 文件将会被链接到 /usr/local/bin/chinesize,这个路径已经添加到我们的 $PATH 环境变量里,所以就可以执行命令 chinesize。在 Windows 电脑将创建一个 cmd 命令文件来执行bin/chinesize.js 文件
# npm link
在发布之前,我们无法通过 npm install -g 安装我们的程序包,那我们要怎么测试呢?这个时候我们可以使用 npm link (opens new window) 命令。
在项目根目录下运行
$ npm link
它会将我们的程序包 chinesize 链接到 {prefix}/lib/node_modules/chinesize。同时还会将包中的 bin/chinesize.js 链接到 {prefix}/bin/chinesize。因为都是符号链接,所以项目的任何改动直接影响 chinesize 命令,不需要重新运行 npm link。
prefix 是 npm global prefix,可以通过 npm config get prefix 查看
我们现在可以在 chinesize.js 写代码,然后通过 chinesize 命令直接运行了。
#!/usr/bin/env node

console.log('Hello, Chinesize!');
2
3
$ chinesize
Hello, Chinesize!
2
# 参数解析
在实现汉化功能之前,我们先看看怎么解析命令行参数。一般的 Node.js 命令行工具都会有参数,比如:
$ jscodeshift fileA --transform myTransforms --dry
可以通过 process.argv 访问 Node.js 命令行工具的参数
// chinesize.js
console.log(process.argv);
2
运行下面的命令
$ chinesize file name=path --type=html --log output.txt --silent
输出:
[
  '/Users/cp3hnu/.nvm/versions/node/v16.14.0/bin/node',
  '/Users/cp3hnu/Documents/mine/chinesize/index.js',
  'file',
  'name=path',
  '--type=html',
  '--log',
  'output.txt',
  '--silent'
]
2
3
4
5
6
7
8
9
10
从输出中可以看出 process.argv 是个数组,参数以空格分隔,第一个参数 argv[0] 表示 node 的路径(我使用 nvm),第二个参数 argv[1] 表示运行程序的文件路径,后面是以空格分隔的参数列表。
从上面的输出我们可以看出,解析 process.argv 会比较麻烦。比如,哪些是参数,哪些是选项?选项名称前面要不要 "--"?选项名与选项值之间要不要 "=" 连接?布尔值的选项要怎么表示?等等...
所以我们使用第三方库来解析参数。我们这里使用了 commander (opens new window),yargs (opens new window) 是另一个不错的选择。
# commander
# 安装
$ npm install commander
# 教程
commander 支持选项参数和普通参数,选项参数支持长名称( -- )和短标记( - ),以空格分隔。
// index.js
import { program } from 'commander';

program
  .option('--first')
  .option('-s, --separator <char>');

program.parse();

const options = program.opts();
const limit = options.first ? 1 : undefined;
console.log(program.args[0].split(options.separator, limit));
2
3
4
5
6
7
8
9
10
11
12
commander 使用 program.parse() 方法解析命令行参数。
program.opts()返回解析后的选项参数,它是一个对象({选项名: 选项值})program.args返回没有被解析成选项的剩余参数,它是一个数组。
commander 支持下面选项参数的写法
serve -p 80
serve -p80
serve --port 80
serve --port=80
2
3
4
commander 还自带了帮助文档和错误提示。
$ node index -s / --fits a/b/c
error: unknown option '--fits'
(Did you mean --first?)

$ node index -s / --first a/b/c
[ 'a' ]

$ node index --help
Usage: index [options]

Options:
  --first
  -s, --separator <char>
  -h, --help              display help for command
2
3
4
5
6
7
8
9
10
11
12
13
14
commander 也支持子命令,像 git clone 一样。比如,下面定义了一个 string-util split 的子命令
// string-util.js
import { Command } from 'commander';
const program = new Command();

program
  .name('string-util')
  .description('CLI to some JavaScript string utilities')
  .version('1.0.0');

program
  .command('split')
  .description('Split a string into substrings and display as an array')
  .argument('<string>', 'string to split')
  .option('--first', 'display just the first substring')
  .option('-s, --separator <char>', 'separator character', ',')
  .action((str, options) => {
    const limit = options.first ? 1 : undefined;
    console.log(str.split(options.separator, limit));
  });

program.parse();
2
3
4
5
6
7
8
9
10
11
12
13
14
15
16
17
18
19
20
21
commander 的每个子命令都要求有一个操作处理程序,可以是 action 函数,也可以是单独的可执行文件
$ node string-util.js help split
Usage: string-util split [options] <string>

Split a string into substrings and display as an array.

Arguments:
  string                  string to split

Options:
  --first                 display just the first substring
  -s, --separator <char>  separator character (default: ",")
  -h, --help              display help for command

$ node string-util.js split --separator=/ a/b/c
[ 'a', 'b', 'c' ]
2
3
4
5
6
7
8
9
10
11
12
13
14
15
commander 的详细教程,请参考 commander 的官方文档 (opens new window)
# 使用
回到我们的命令行工具 chinesize。Angular 的汉化分为两步:提取和替换,所以我们定义了两个子命令:extract 和 repalce。
// bin/chinesize.js
#!/usr/bin/env node

import { Command, Option } from 'commander';
const program = new Command();
import { extract  } from './src/extract.js';

program
  .name('chinesize')
  .description('CLI to convert English Angular project to Chinese')
  .version('1.0.0');

program
  .command('extract')
  .description('Extract English texts of Angular project')
  .argument('<dir>', 'directory of Angular project')
  .addOption(
    new Option('-t, --type <type>', 'file type')
      .choices(['html', 'js'])
      .makeOptionMandatory(false)
  )
  .option('-o, --output <filePath>', 'file path for writing the extracted English text')
  .action((dir, options) => {
    extract(dir, options.type, options.output);
  });

program
  .command('replace')
  .description('Replace English texts of Angular project to Chinese')
  .usage('<dir> [options]')
  .argument('<dir>', 'directory of Angular project')
  .addOption(
    new Option('-t, --type <type>', 'file type')
      .choices(['html', 'js'])
      .makeOptionMandatory(false)
  )
  .option('-i, --input <filePath>', 'path of file for reading the Chinese text')
  .option('-p, --prettier-config <configFilePath>', 'path of config file for prettier')
  .action((dir, options) => {
    replace(dir, options.type, options.input, options.prettierConfig);
  });

program.parse();
2
3
4
5
6
7
8
9
10
11
12
13
14
15
16
17
18
19
20
21
22
23
24
25
26
27
28
29
30
31
32
33
34
35
36
37
38
39
40
41
42
43
extract 有 1 个参数和 2 个选项:
dir:汉化的 Angular 项目目录--type <type>:要转换的文件类型,是html文件还是js/ts文件。如果没有提供,则同时转换两者--output <filePath>:输出文件路径,提取的英文文本将写入这个文件。如果没有提供,默认是 Angular 项目目录下的chinesize/texts-to-translate-{html|ts}.json文件
replace 有 1 个参数和 3 个选项:
dir:汉化的 Angular 项目目录--type <type>:要转换的文件类型,是html文件还是js/ts文件。如果没有提供,则同时转换两者--input <filePath>:中英文翻译的文件路径。如果没有提供,默认是extract生成的文件路径--prettier-config <configFilePath>:prettier配置文件路径。如果没有提供,则不使用prettier格式化代码
# 优化输出
Node.js 提供了 console (opens new window) 模块输出日志或者错误信息到控制台,但是错误信息和日志是一样的样式,用户不好发现,比如提示用户给的项目目录不存在,输出错误如下:

希望显示红色的字体,这样比较醒目。Node.js 支持 escape sequences (opens new window) 来设置字体颜色
console.log('\x1b[31m%s\x1b[0m',`Error: "${dir}" is not exists`);
ansi escape code 以
\x1b或者\033开头,它们表示ESC(27),所以叫做 ansi escape code。
但是这种写法比较丑陋,所以 chalk (opens new window) 应运而生
yoctocolors(opens new window) 是一个轻量级的选择
# chalk
给控制台输出添加样式
# 安装
$ npm install chalk
# 使用
chalk API:
chalk.<style>[.<style>...](string, [string...])
chalk 提供了多个设置样式的函数,比如 red、bold、bgRed 等等,它们可以级联使用,更多详情请参考 chalk 官方文档 (opens new window)
现在我们使用 chalk 来设置我们的错误信息,比如:
console.log(chalk.red.bold(`Error: "${dir}" is not exists`));

还可以使用
chalk-animation(opens new window) 添加动画gradient-string(opens new window) 添加渐变色terminal-link(opens new window) 添加可点击的链接
# 发布
在测试、验证功能完全正确之后,就可以发布到 npm 上了。
首先做一些准备工作:
- 在 npm 官网 (opens new window)上创建 npm 账号
- 在 github 上创建 repo,并将代码上传到 github
- 修改
package.json文件,填写repository、homepage、bugs等字段
{
  "name": "chinesize",
  "version": "0.0.1",
  "description": "Convert English React/Angular/HTML project to Chinese",
  "repository": {
    "type": "git",
    "url": "https://github.com/cp3hnu/chinesize"
  },
  "homepage": "https://github.com/cp3hnu/chinesize#readme",
  "bugs": "https://github.com/cp3hnu/chinesize/issues",
  "main": "index.js",
  "type": "module",
  "scripts": {
    "test": "echo \"Error: no test specified\" && exit 1"
  },
  "bin": {
    "chinesize": "bin/chinesize.js"
  },
  "keywords": [
    "chinesize",
    "angular",
    "react",
    "html",
    "posthtml"
  ],
  "author": "cp3hnu",
  "license": "ISC",
  "dependencies": {
    "chalk": "^5.3.0",
    "commander": "^12.1.0",
    "posthtml": "^0.16.6",
    "prettier": "^3.3.3"
  },
  "engines": {
    "node": ">=16"
  }
}
2
3
4
5
6
7
8
9
10
11
12
13
14
15
16
17
18
19
20
21
22
23
24
25
26
27
28
29
30
31
32
33
34
35
36
37
38
完成上面的准备工作之后,就可以发布了
- 首先检查 npm 源,如果是淘宝源,则需要改回 npm 源
# 查看npm 镜像源地址
$ npm config get registry

# 设置 npm 默认源
$ npm config set registry https://registry.npmjs.org/
2
3
4
5
也可以使用
nrm(opens new window) 工具
- 查看哪些文件被打包上传
$ npm pack --dry-run
可以通过 .gitignore 或者 .npmignore 排除不需要上传的文件,也可以通过设置 package.json 的 files 指定需要打包哪些文件
- 查询是否已经存在重名的包
$ npm search chinesize
No matches found for "chinesize"
2
- 登录 npm
$ npm login
如果是 npm v9,需要使用
npm login --auth-type legacy
- 发布
$ npm publish

Publishing to https://registry.npmjs.org/ with tag latest and default access
Authenticate your account at:
https://www.npmjs.com/auth/cli/6fa1a0c8-4fd1-4cf3-9895-6b00fa83e384
Press ENTER to open in the browser...

+ chinesize@0.0.1
2
3
4
5
6
7
8
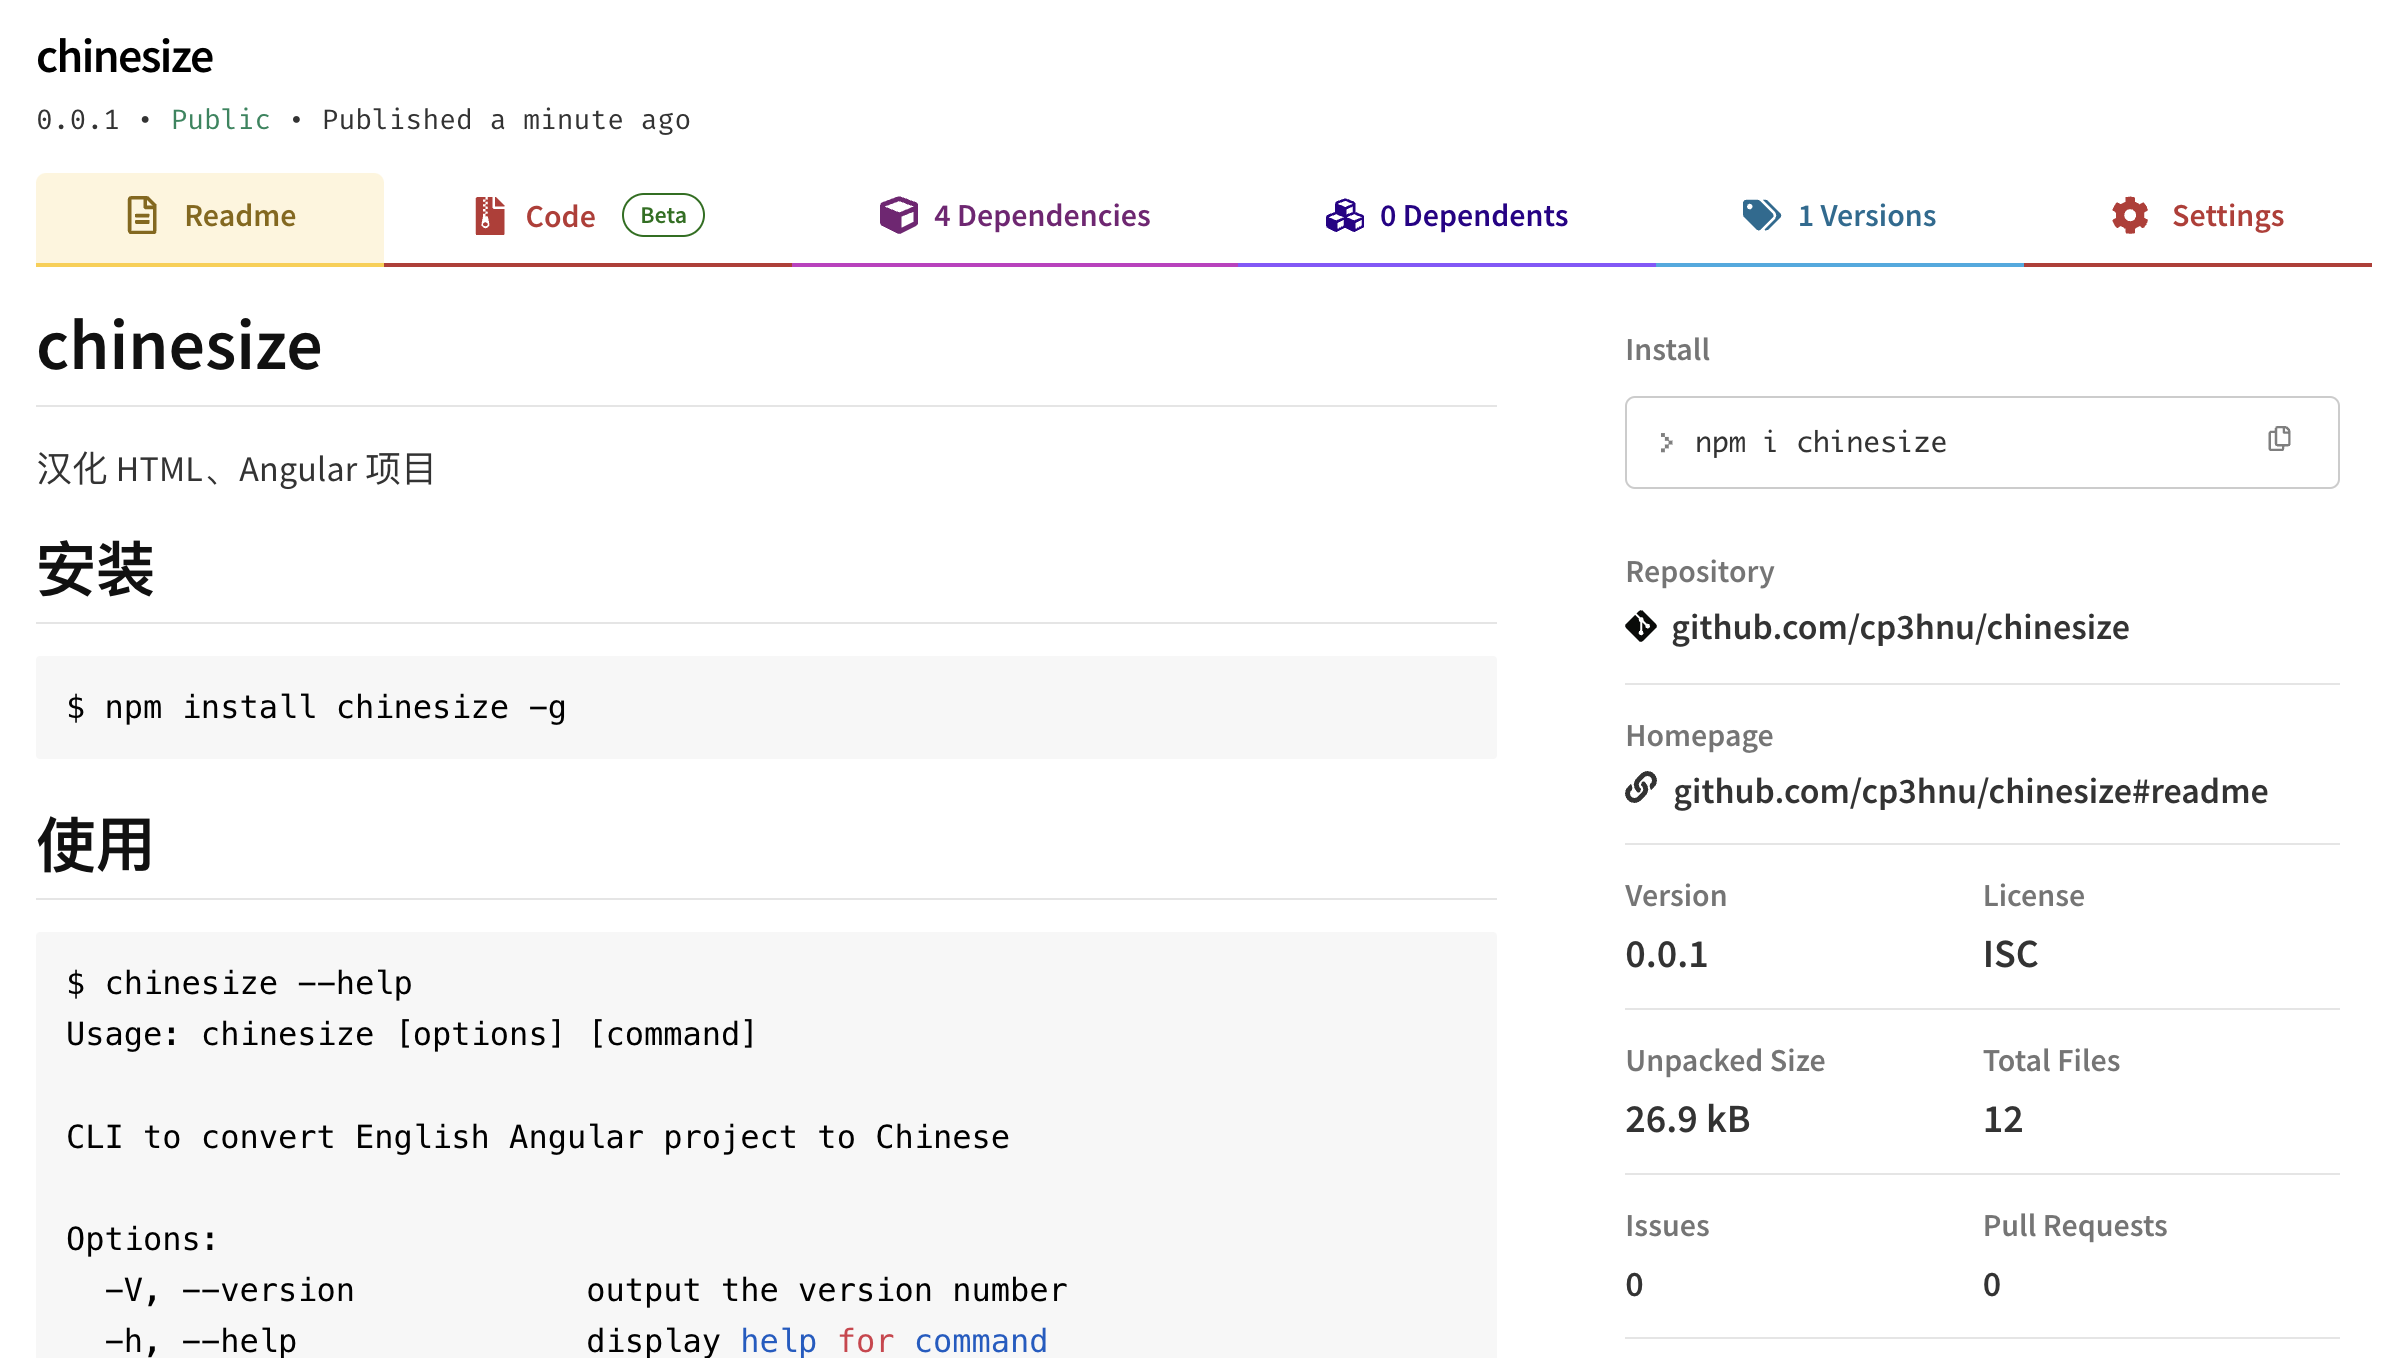
- 测试
$ npm unlink chinesize
$ chinesize --help
$ npm install chinesize -g
$ chinesize --help
2
3
4
- 更新
完成代码修改之后,打开 package.json 文件,修改 version 字段,比如从 0.0.1 更新到 0.0.2,然后通过 npm publish。
也可以通过 npm version (opens new window) 自动增加版本号,并且 commit 修改。
// 增加补丁号
$ npm version patch

// 增加次版本号
$ npm version minor

// 增加主版本号
$ npm version major
2
3
4
5
6
7
8
关于版本管理,请参考 Semantic Versioning 2.0.0 (opens new window)
# 实现效果
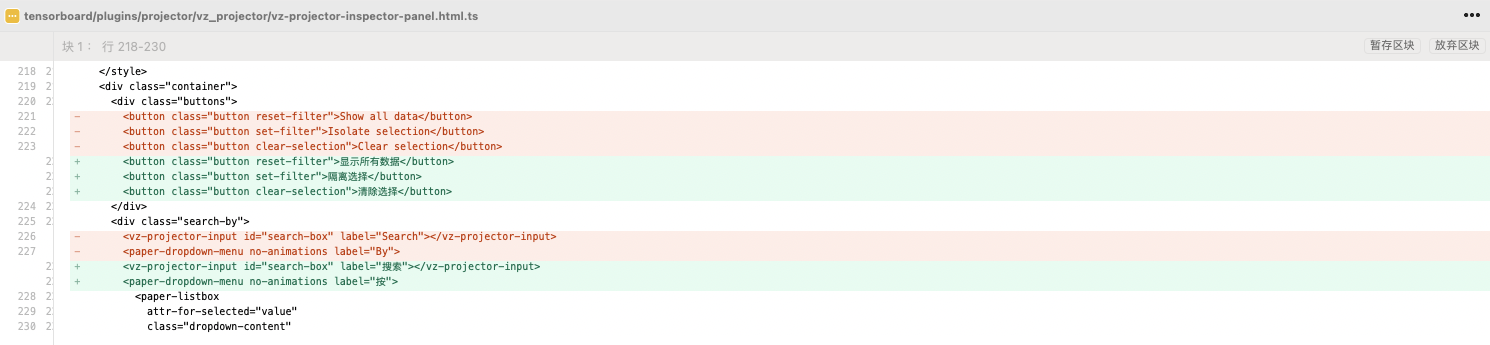
通过 sourcetree 查看英文文本是否被替换成了中文。
# 完整代码
github 地址:chinesize (opens new window)
npm 地址:chinesize (opens new window)
# References
posthtml(opens new window)cheerio(opens new window)htmlparser2(opens new window)parse5(opens new window)- AST Explorer (opens new window)
- How to build a CLI with Node.js (opens new window)
- 如何使用 Node.js 构建一个命令行应用(CLI) (opens new window)
- What the heck are CJS, AMD, UMD, and ESM in Javascript? (opens new window)
- CommonJs、AMD、UMD、ESM 模块化的区别 (opens new window)
- npm (opens new window)
nrm(opens new window)commander.js(opens new window)yargs(opens new window)chalk(opens new window)yoctocolors(opens new window)picocolors(opens new window)micromatch(opens new window)inquirer(opens new window)enquirer(opens new window)prompts(opens new window)isomorphic-git(opens new window)git-js(opens new window)nodegit(opens new window)fs-extra(opens new window)awesome-nodejs(opens new window)- Semantic Versioning 2.0.0 (opens new window)